> ## Documentation Index
> Fetch the complete documentation index at: https://docs.cutmeshort.com/llms.txt
> Use this file to discover all available pages before exploring further.

# Introduction

> Learn more about the CMS Analytics script and how to install it.

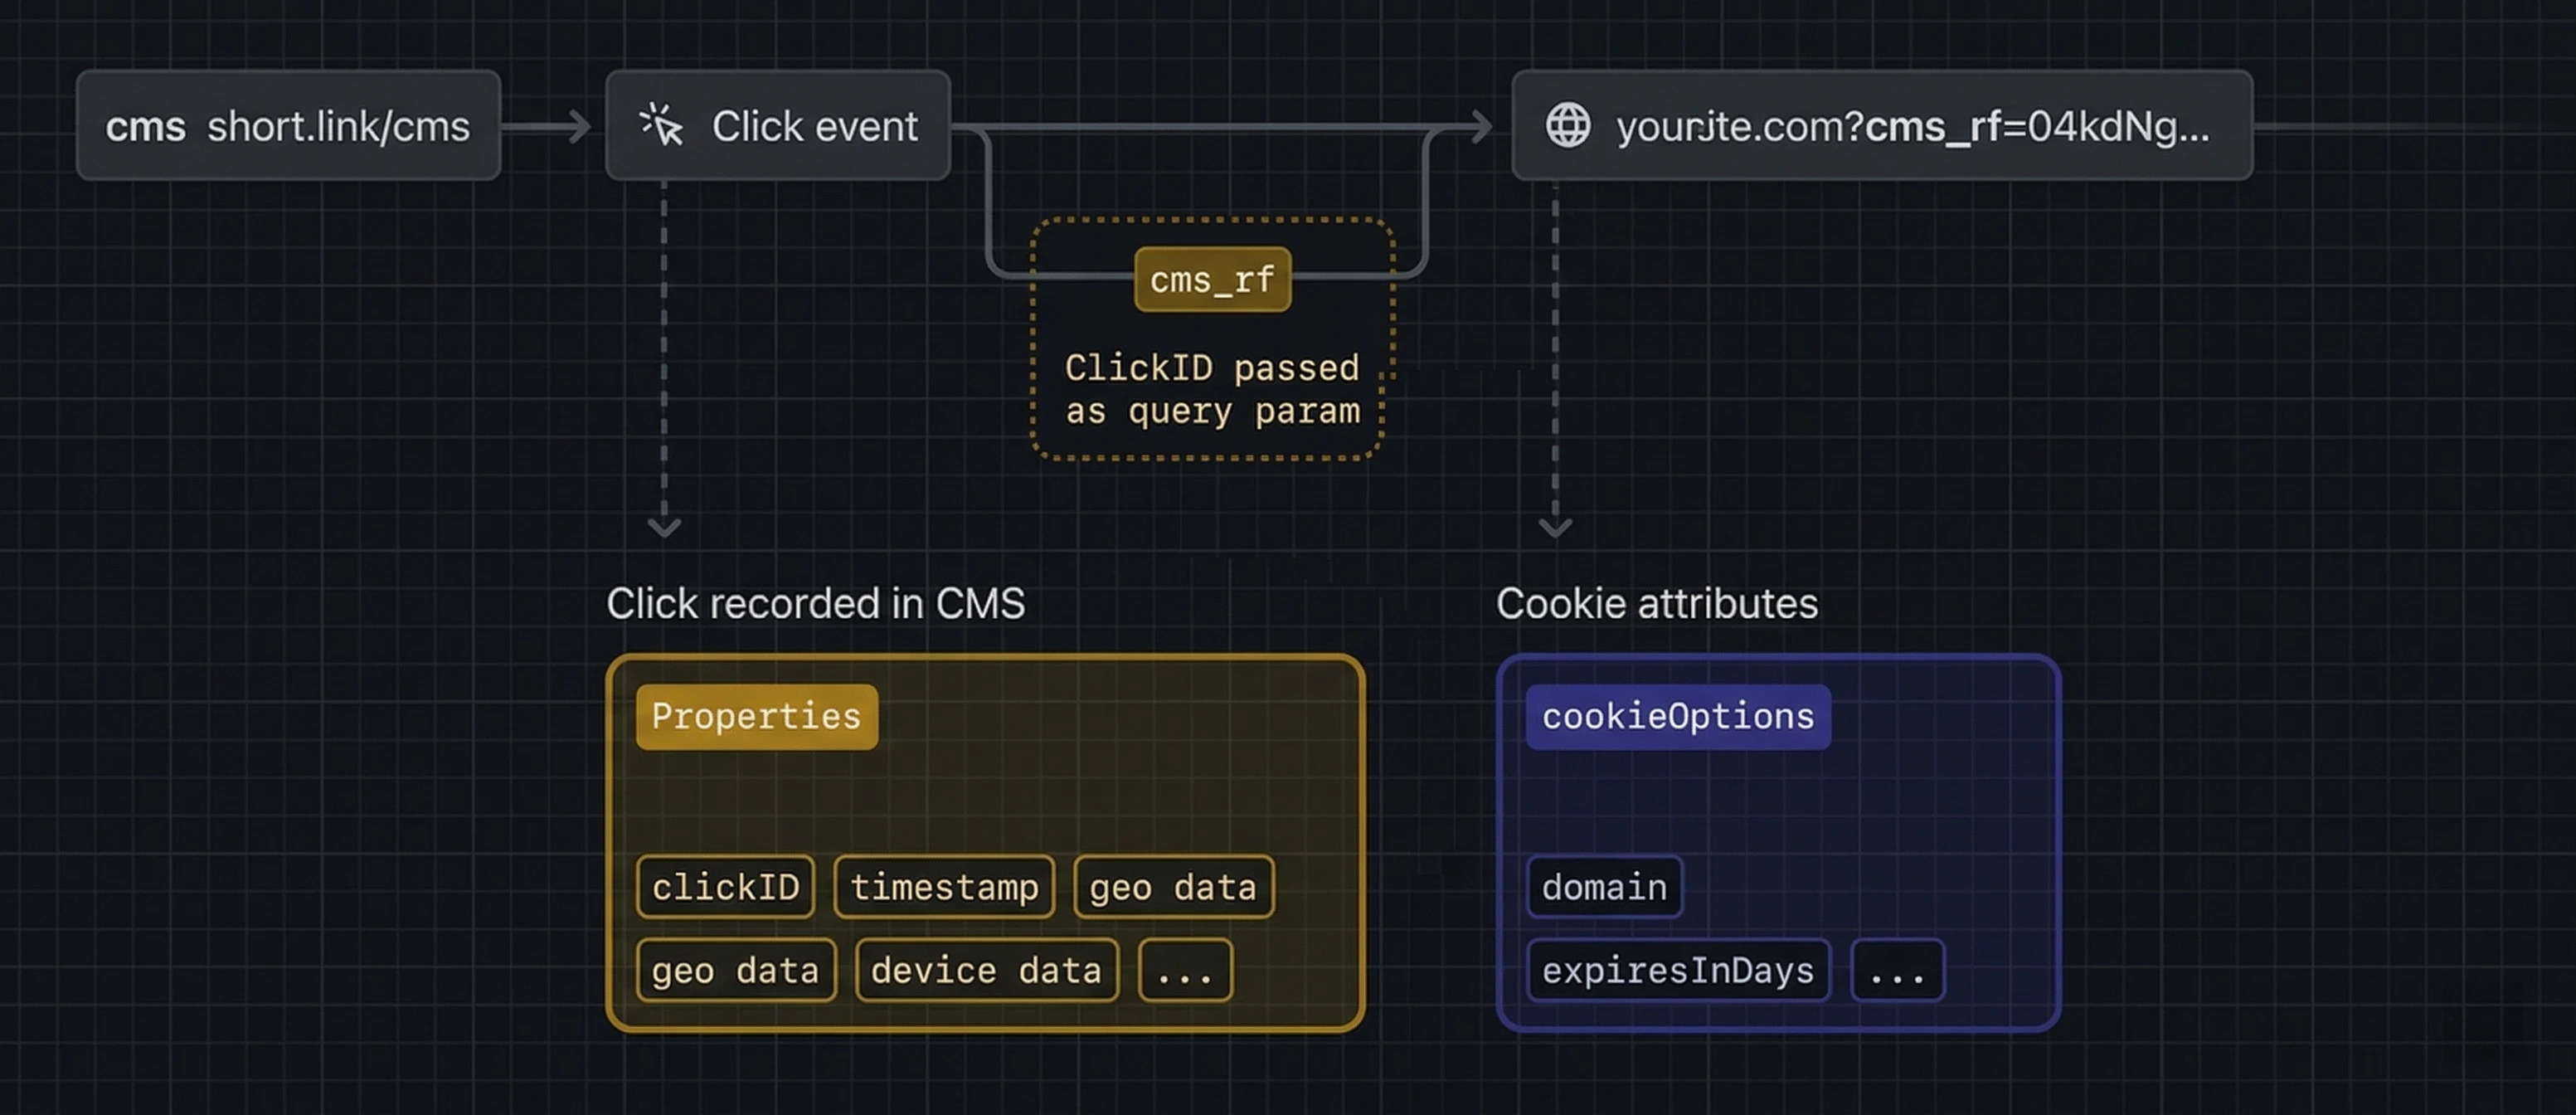
CMS Analytics is a client-side script for tracking conversion events with CMS.

```html theme={null}
<script
  src="https://cut-me-short-public.s3.ap-south-1.amazonaws.com/production/track.js"
  data-config='{"days":30,"attribution":"last"}'
></script>
```

The script detects the cms\_rf query parameter and stores it as a first-party cookie. You can configure cookie duration and attribution model using the `data-config` property.

<Tip>
  If you want to learn more about first-click vs last-click attribution, check out this [detailed guide](/api-reference/endpoint/clickattribution).
</Tip>

<img src="https://mintcdn.com/cutmeshort/WRUKHC6fhoVKHM9y/images/Attribution/scriptworking.png?fit=max&auto=format&n=WRUKHC6fhoVKHM9y&q=85&s=f4313cda09a0c2fdb5b2c5e8f23dd2cb" alt="Lead event attribution flow" style={{ maxWidth: "720px", width: "100%", borderRadius: "12px", margin: "12px 0" }} width="3106" height="1344" data-path="images/Attribution/scriptworking.png" />

## Installation Guides

You can install the CMS Analytics script:

<div
  style={{
display: "grid",
gridTemplateColumns: "repeat(2, 1fr)", 
gap: "16px",
margin: "24px 0",
alignItems: "start", 
}}
>
  {[
      {
        name: "Manual Installation",
        href: "/sdks/clientside/manualinstallation",
        img: "/images/Attribution/manualinstallation.png",
      },
    ].map((item) => (
      <a
        href={item.href}
        style={{
          padding: "12px 16px", 
          height: "56px", 
          display: "flex",
          alignItems: "center",
          gap: "12px",
          border: "1px solid #e5e7eb",
          borderRadius: "10px",
          textDecoration: "none",
          color: "#111827",
          background: "#fff",
          transition: "all 0.25s ease",
        }}
        onMouseEnter={(e) => {
          e.currentTarget.style.borderColor = "#3b82f6";
          e.currentTarget.style.boxShadow = "0 8px 20px rgba(0,0,0,0.06)";
          e.currentTarget.style.transform = "translateY(-2px)";
        }}
        onMouseLeave={(e) => {
          e.currentTarget.style.borderColor = "#e5e7eb";
          e.currentTarget.style.boxShadow = "none";
          e.currentTarget.style.transform = "translateY(0)";
        }}
      >
        <img
          src={item.img}
          alt={item.name}
          style={{
            width: "28px",
            height: "28px",
            objectFit: "contain",
          }}
        />
        <span style={{ fontSize: "15px" }}>{item.name}</span>
      </a>
    ))}
</div>

## Properties

### `data-config`

|             |                                    |
| ----------- | ---------------------------------- |
| **Type**    | `JSON string`                      |
| **Example** | `{"days":30,"attribution":"last"}` |

Configure tracking behavior for cookie duration (`days`) and attribution model (`attribution`).

Use one of these script configurations based on your attribution strategy:

```html theme={null}
<!-- first-click, 90-day cookie -->
<script src="cms-tracker.js" data-config='{"days":90,"attribution":"first"}'></script>

<!-- last-click, 30-day cookie -->
<script src="cms-tracker.js" data-config='{"days":30,"attribution":"last"}'></script>
```
